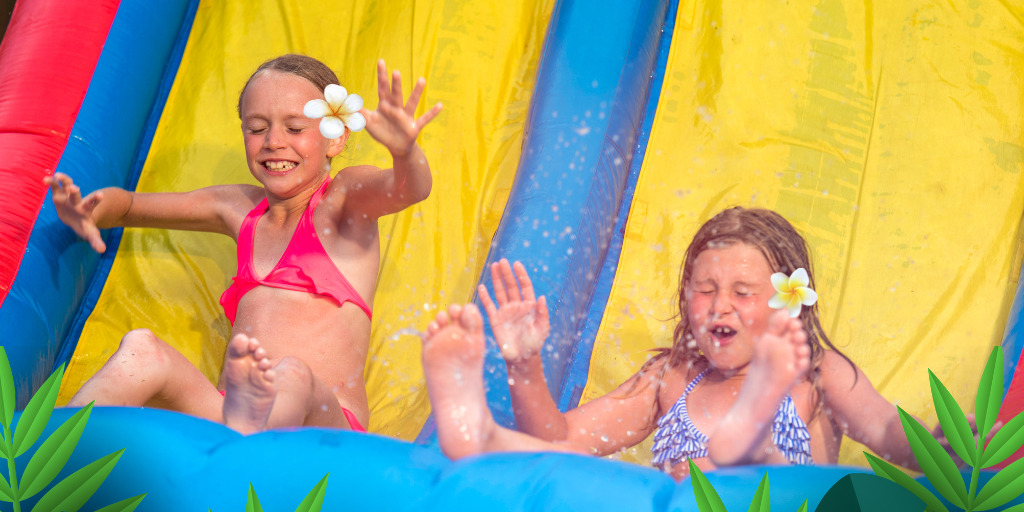
The sound of water splashing, the way sunlit droplets catch on a blade of grass, and the simple thrill of a child stepping into a shallow pool without the fuss of a full-blown pool design — these are the rhythms that pull a family toward a DIY splash pad. A home splash pad isn’t a single feature, but a mosaic of clever water play ideas that fit real yards, budgets, and the life you lead. This is a field where practical know-how matters as much as imagination. It’s about choosing safe, reliable options that can be built or assembled without specialized equipment, and then layering in little details that make hours of play feel magical.
I’ve spent summers chasing this exact mix of art and practicality. I’ve laid out hoses and sprinkler assemblies on sunbaked concrete, measured out space for a soft landing of lawn, and installed simple features that transformed a tired backyard into a family playground. The joy of a homemade splash pad isn’t just about the glistening water. It’s about the quiet triumph of designing something that stays within budget, remains mindful of safety, and still delivers big moments of delight. Below I share ideas drawn from real projects, with honest notes about what worked, what surprised us, and where a small tweak makes a big difference.
A framework for choosing ideas rests on three questions. First, how will you source the water and control the flow? Second, what surface will the water touch, and how will you keep it safe and fun? Third, how will you layer features so play stays fresh as kids grow older or as seasons change? The answers will guide you toward a plan that feels coherent rather than a jumble of gadgets. It helps to picture a playday that doesn’t have to end when the sprinkler turns off or when a battery runs low. A well-sculpted splash pad can live in a yard year round, morphing with weather and family needs.
Setting the stage: the space and the base
Begin with the footprint. A splash pad can live on a small concrete slab, a smooth patio, or a section of level, well-drained gravel. The key is safety. You want a surface that is slip resistant when wet, doesn’t heat up to a scalding temperature in sun, and offers a forgiving touch if someone takes a tumble. If you’re working with bare earth or uneven ground, a shallow, purpose-built pad of poured concrete or sealed pavers can transform risky spots into reliable zones. In my own setup, we started with a 12 by 14 foot section of sealed concrete, polished just enough to avoid a slick feel but still comfortable to walk on with bare feet. It wasn’t large, but it provided a stable stage for plugs and sprinklers and a durable landing for a cherished toy boat that makes the rounds in the water stream.
Consider the water source. A garden hose is the simplest anchor. If you want more control, a small outdoor pump with a dedicated return line and a tidy manifold gives you the ability to channel water to different features without kinking hoses. A single modest pump can support a handful of spray jets and a water curtain, and you don’t need a commercial-grade system to get good results. For households who want to minimize water use, a pass-through design that recycles water within a contained basin can be surprisingly effective. The basin can be a shallow, wide trough filled with a few inches of water, just enough to wash over the top of the features and create a sense of continuous motion. When the kids are older and more independent, that same basin can become a habitat for plastic boats, toy ducks, and floating cups that ride the current.
The anatomy of a DIY splash pad
One of the most satisfying parts of this project is the learning that happens as you assemble components and tune the flow. Water dynamics matter as much as the look of the feature. You want drops, jets, and sheets that deliver consistent play without creating a watery mess or a loud, uncoordinated spray that makes it hard to hear conversation or hear each other call for a timeout. A balanced mix typically includes a selection of spray jets, a gentle waterfall or curtain, a shallow pool for splashes, and a few interactive features that invite discovery.
A typical layout places a central water curtain as the heart of the pad. This is a sheet of water that cascades from a low rim or a series of small nozzles arranged to create a shimmering veil. A curtain is inviting because it has motion and sound without the intensity of a high-pressure jet. Nearby, sprinkle jets or a ring of small nozzles provide micro jets that kids can stomp through or chase across the surface. A shallow, sun-warmed pool at the periphery serves as a resting moment between bursts of activity, and a few floating toys keep the game anchored in place.
The beauty of modular design lies in the ability to change the configuration over time. A few removable modules home made splash park ideas let you swap in new shapes or relocate spray patterns as children grow or as you want to refresh the scene for a birthday or family gathering. The most reliable modules are those that snap into a simple base plate or mount to a guard rail. You want to be able to adjust pressure or swap out a nozzle without disassembling the entire pad.
Caution and care: safety first
Water play invites movement, and movement invites attention to safety. There are a few non negotiables to keep the play zone inviting rather than perilous. First, ensure a non slip surface that stays grippy when wet. Smooth, glossy concrete looks attractive but becomes treacherous once water sits on it. If you’re unable to treat the surface, a rubberized, outdoor matting layer can be laid down in high traffic zones. It should extend a comfortable radius around the edge of the pad so there aren’t sharp transitions from water to dry ground.
Second, if a pump or electrical components are involved, keep all wiring and outlets dry and away from puddles. A simple, weather protected outlet installed by a qualified electrician can save a lot of stress. Use outdoor rated components, GFI protected circuits, and avoid using extension cords beyond a short run from the main panel. If you’re uncertain, call in a pro. It’s not glamorous, but it’s peace of mind.
Third, moderate water use and proper drainage matter. If you’re using a basin or a sunken channel, you’ll want a simple overflow line that channels excess water away from the pad and toward a garden bed or a drainage trench. A compact, submersible pump that’s rated for continuous outdoor use tends to last longer when you keep it out of standing water after play time. A little planning here saves a lot of cleanup later.
From hose to hard features: a spectrum of ideas
Homemade water park ideas at home come in many shapes. Some families lean into tactile simplicity, while others chase a more cinematic, watery playground. Below are ideas that can be implemented individually or combined to build a cohesive splash pad that feels custom without breaking the bank.
Massive but gentle spray garden
Imagine a semicircle of spray jets arranged along the edge of the pad that produce a soft, rainlike drizzle. The goal isn’t to blast, but to bathe. These are best when paired with a few taller jets at the far end that offer the occasional dramatic burst for a quick burst of energy. The effect is akin to a gentle rainforest storm and works well for younger children who mainly splash and chase butterflies rather than chase a ball through a high pressure stream. A practical approach is to use three or four larger nozzles plus eight to ten small jets. The larger ones are placed at the back to create height, while small jets form a shimmering curtain along the perimeter.
Water curtain with playful downstream paths
A curtain feature creates a visually striking line of falling water. It becomes a sonic backdrop for games in which kids run across the pad and get a few pleasant sprays from the curtain as they pass. You can add downstream pathways built of stone or pavers with shallow troughs that guide the water along a gentle current. A few stepping stones placed by design help kids imagine a little river crossing while the water keeps them cool. The downstream path can be choreographed to deliver surprise squirts as water encounters small baffles or arches.
Interactive spray discs and hidden surprises
The heart of play often lies in discovery. Install a set of discs tucked into a recessed area that flip into a spray when a child steps on a foot pedal or lands on a slight tilt of the surface. The joy comes from releasing the hidden spray, which turns a calm moment into a mini game. You can place discs in a staggered pattern so that one spray triggers another, creating a gentle chain reaction that feels almost orchestral. The key here is to keep the mechanism robust and accessible for maintenance. If a child stomps repeatedly without triggering a feature, you may want to adjust the sensitivity or position.
Turning the pad into a water park at home with themed zones
A splash pad isn’t just a surface with water on it. It can be a stage for mini immersive experiences. Themed zones let children enact stories or adventures while staying active. A pirate cove with spray cannons that shoot harmless arcs to simulate cannon fire, for instance, can be both thrilling and safe. A jungle hideaway with a waterfall curtain and a few green-tinted jets can evoke a sense of exploration. A space station corner with narrow jets that resemble stars shooting through space adds a dash of imagination to practical water play. Thematic elements can be created with low cost props and a little clever placement. When you combine a few modular features with inexpensive visual cues, the pad becomes a story in motion rather than a static water feature.
Water power and motion: gravity, pressure, and timing
Understanding how water moves helps you tune the play experience. Pressure matters more than you think. A higher flow rate creates bolder sprays, but it can also produce a spray pattern that drifts onto surfaces where it isn’t welcome. My approach is to run a modest system that delivers consistent spray without becoming a chore to manage. A smart tactic is to run a single pump with a flow regulator and an adjustable manifold. That way you can fine tune to the current weather and the intensity you want for a given afternoon. You might start with a baseline flow that provides a three to five foot spray distance for the larger jets and a curtain width of about three feet. If a heat wave hits, you push the regulators just a touch to increase the water movement for a brighter splash.
Maintenance and practicalities you’ll thank yourself for later
An outdoor water feature is not a set it and forget it proposition. You’ll want to check fittings for leaks, keep hoses untangled, and inspect nozzles for mineral buildup, especially in areas with hard water. A mild vinegar rinse every few weeks can help keep mineral deposits at bay if you’re dealing with scale. Some folks install simple screens to prevent leaves and grass clippings from entering the pump or the channels. Clean lines and a tidy base keep the play space inviting. If you plan to store the pad for the off season, drain the basin, disconnect the pump, and cover exposed components to protect them from the elements. A little winterization goes a long way toward preserving a system that’s fun every summer.
Two practical options to consider for quick wins
- A compact, modular kit with a small pool of water in the center and a ring of jets around the edge. It’s quick to assemble, can be relocated if you move, and scales well with a changing family size. A gravity-fed curtain with a shallow trough that runs along one edge of the pad. Gravity reduces energy use, the design is forgiving, and it creates a visually striking water front that kids love to step through.
Cost considerations: what you can expect to spend
The economics of a home splash pad vary widely, depending on the surface you start with, the complexity of features, and the quality of components. A lean, hose-based design with a few sprayers and a curtain can be assembled for under a thousand dollars, especially if you repurpose materials you already own and source nozzles from budget-friendly outlets. If you want a sturdier, more permanent installation with a dedicated basin, a small pump, and a curated set of nozzles, plan on spending in the range of two to four thousand dollars. A high end, fully integrated system with smart controllers and custom-milled features can push past five thousand dollars, but the payoff is an extremely durable setup that reduces maintenance time and yields a polished, park-like aesthetic.
Edge cases and design tweaks that matter
- Climate and sun exposure influence your choices. In hotter climates the appeal of a cooler, higher volume spray may justify a bigger investment in flow and a larger surface area. In milder regions, you might emphasize rain curtain experiences and smaller jets because outdoor play time is more variable. Family dynamics matter. If you have toddlers who adore water play with a watchful parent nearby, a shorter, wider splash zone with a gentle spray overhead can be perfect. If you’re balancing multiple children who want to compete in a lighthearted race or game, a few discrete zones with independent controls can reduce conflicts and keep the play flowing. Safe, simple maintenance beats elaborate systems. A pad that you can clean with a quick wipe, that drains well, and that uses straightforward components will get used more often. Complicated, hard to fix systems can become a barrier to summer fun.
A personal case study: a family’s evolving splash pad
When we built our first splash pad, the goal was simple: a few spray jets, a shallow pool, and a water curtain that wouldn’t demand a full afternoon of setup. We started with a 12 by 12 foot square on a smooth concrete surface. The budget was tight, but we wanted a feature that would survive the test of a growing family. We installed a low railing along the edge, a modest pump, and a handful of adjustable nozzles. The curtain proved to be the star. It invited the kids to run through it, to duck under it, and to stand beneath the sheet of falling water as if awaiting a tropical rain. The rest of the features, a handful of stationary jets and a circular splash pool, complemented the curtain with gentle motion. The result was a space that felt like a mini water park carved into a suburban backyard. The kids noticed hours of play but it didn’t dominate the yard. It felt like an extension of family life rather than a separate object.
Over two seasons we made small changes that kept the play fresh. We swapped out a few nozzles to alter spray patterns, added a hidden disc mechanism under one tile so a child could trigger a spray with a stomp, and moved a group of jets to create a new line of play. The adjustments were quick, inexpensive, and yielded a noticeable uptick in engagement. This is the kind of practical learning that pays off: you don’t need to reinvent everything each year. With modest adjustments you can preserve novelty and keep the pad aligned with your family’s evolving interests.
The art of balancing play and rest
A splash pad is not just about water. It’s about rhythm and relief: the water’s motion gives energy, the heat of the day demands cooldown, and the space you’ve created offers a stage for family moments—laughter, teamwork, quiet observation as a child watches a droplet travel along a curved arc. To sustain interest, you’ll want to alternate between high-energy bursts and slower, more contemplative water experiences. A curtain can provide momentary speed and drama; a shallow pool becomes a place for a cooling pause. The smart move is to design a few predictable cycles into the system: a five minute play burst, followed by a slower water lull, then a different feature—perhaps a hidden spray that starts when someone steps on a designated tile. The unpredictability of the next spray makes every session feel new while staying rooted in safety and order.
Seasonal use, storage, and adaptability
Your splash pad will have a life beyond peak summer. In shoulder seasons a simple water feature can be enough to keep kids engaged, leveraging cool mornings or late afternoon sun. If you live in a climate with winter freezes, plan for storage that protects pumps, hoses, and electronics. A compact, stackable storage bin for hoses and nozzles means you can pull the pad back into service quickly when the warm days return. The adaptability of a modular setup shines here. If a year goes by without heavy use, you can reposition the features to create a fresh scene when you bring it back out.
A note on accessibility and inclusivity
When you design for water play, consider accessibility in the broadest sense. Height and reach vary, so modular designs that can be adjusted in height or adjusted by swapping components are useful. A seated option, where a toddler sits on a small stool and interacts with a fixed spray, can be just as engaging as a standing game. If you have a family member with mobility challenges, plan a layout that allows for easy transfer from a chair or bench to the play zone. The most enduring splash pads are those that invite participation from every family member, regardless of age or ability.
Two lists to guide decisions
- Core considerations before you buy or build Practical steps for maintenance and upkeep
Core considerations before you buy or build
- Surface safety and temperature resistance Water source, pump capacity, and flow control Modularity of features and ease of reconfiguration Drainage and overflow planning Weather resistance and durability of components
Practical steps for maintenance and upkeep
- Inspect fittings for leaks and tightness at the start of each season Clean nozzles and the curtain pool to prevent mineral buildup Guard electrical connections with weatherproofing and GFI protection Drain and store pumps at the end of the season if you live in a climate that freezes Keep a small spare parts kit with o rings, washers, and extra nozzles
What makes a homemade water park feel special
There’s a difference between a set of gadgets and a cohesive experience. The best splash pads I’ve seen and built share several hallmarks. First, they invite discovery. A child learns through trial and error that stepping in a certain area triggers a spray or that a particular tile releases a waterfall. Second, they create a rhythm of activity and rest, so kids can sprint for a minute, pause, and then sprint again. Third, they are adaptable, so the space remains relevant as children grow. Finally, they are grounded in practical constraints: a reasonable budget, safe materials, simple maintenance, and a straightforward installation process.
If you’re just starting to plan, a modest approach can deliver big dividends. Start with a small, sealed pad and a handful of simple features—a curtain, two to four spray jets, a shallow pool—and a single, well-designed trigger. Once you see how the play unfolds, you’ll have a clear sense of what to add, what to replace, and how to recalibrate the space for the next season. The joy of a DIY splash pad is not simply in the water. It’s in the process of imagining, building, and learning with your family, and in the way a small yard can become a beloved watery playground that holds stories in every splash.
A final word about the long view
Building a splash pad at home is not a one-way street. It’s a conversation with space and with your family’s needs. It invites experimentation, but it also rewards restraint. When you choose features that serve many ages and celebrate movement rather than demanding constant attention, you create something that can endure as your household changes. The result is not a perfect replica of a water park but a living, evolving corner of your home where you can pause, cool down, laugh, and watch a child discover the physics of water in real time. That is the heart of homemade water park ideas and the enduring charm of a splash pad built with your hands.
If you’ve been contemplating a project like this, take a practical step this week. Sketch a rough plan of a 12 by 12 foot pad on graph paper or a simple digital sketch. Mark where the curtain might live, where a series of jets could be placed, and where the shallow pool will sit. Think about the water source and the easiest path for drainage. Then, for the next step, measure your available space and check your local building codes or HOA guidelines for outdoor water features. A small amount of upfront planning makes the actual construction feel like a natural extension of your own outdoor life rather than a new chunk of work you have to manage. The joy is in the little details that transform a backyard into a place where your family not only cools off but also reconnects, plays together, and learns through the everyday magic of water.
46 Zorn Blvd suite a, Yaphank, NY 11980 United States